 |
 |
 |
 |
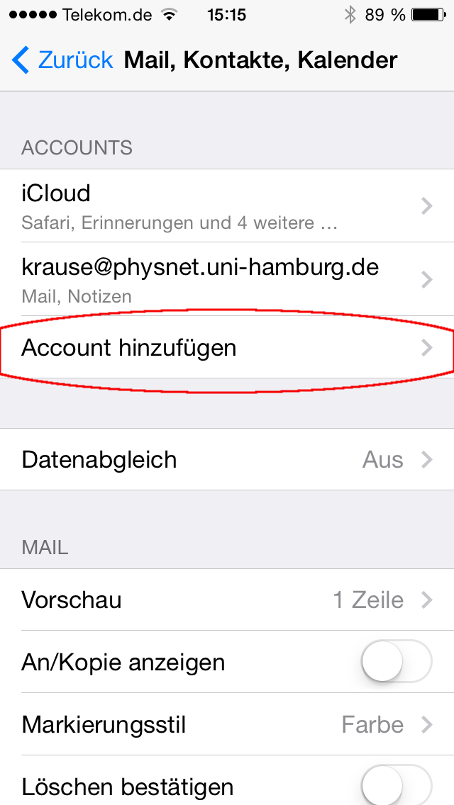
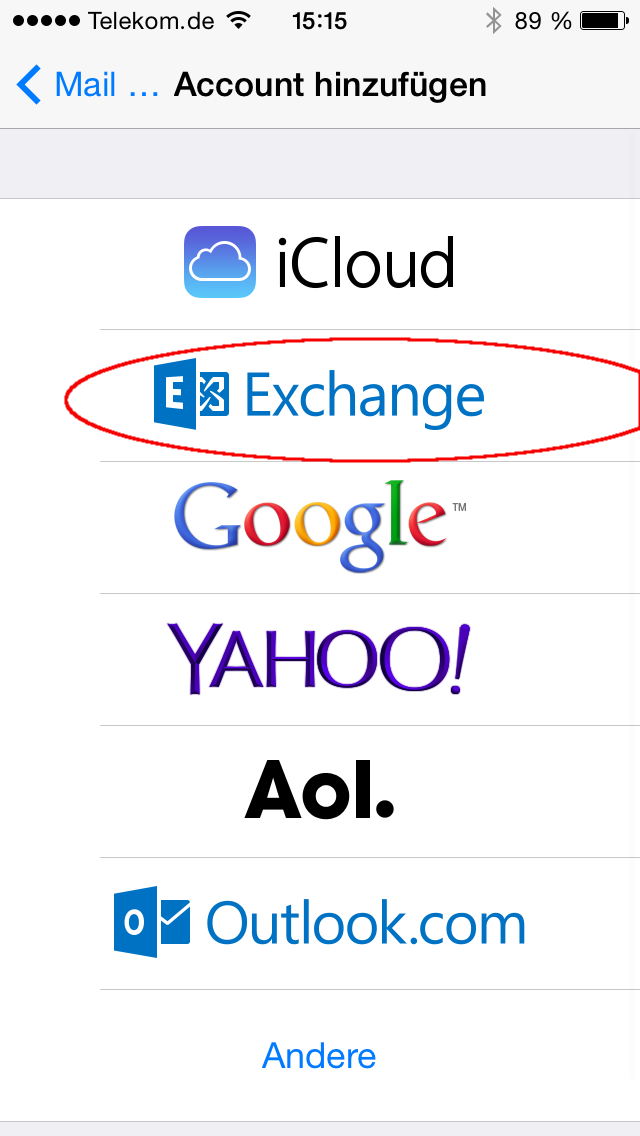
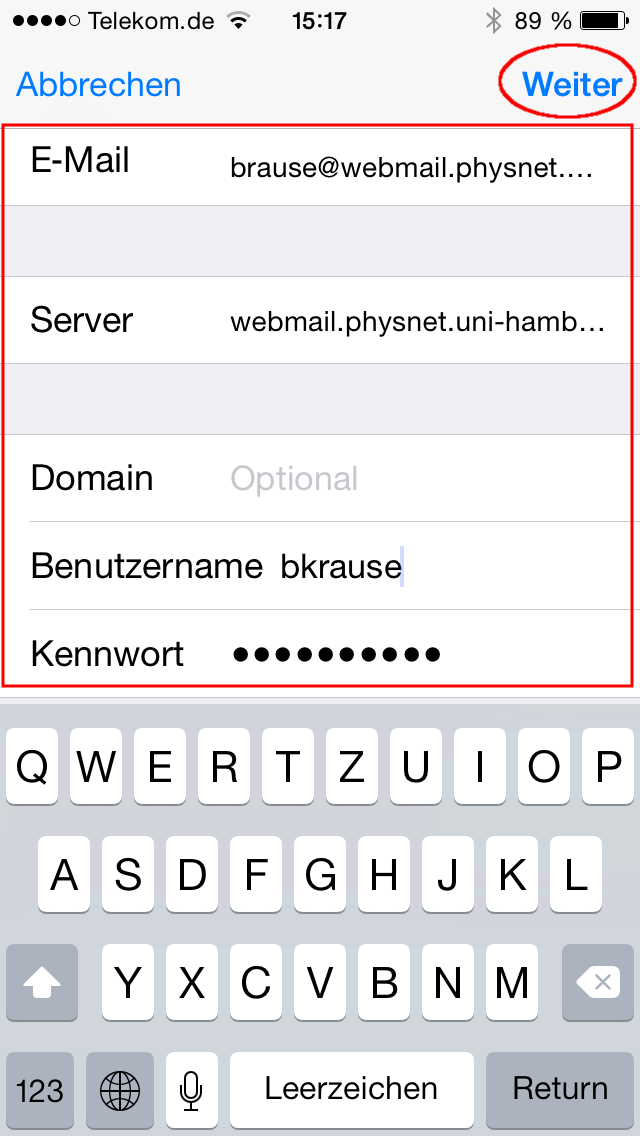
| Tip Settings > Mail, Contacts, Calendars > Add Account | Tip Exchange | Enter
|
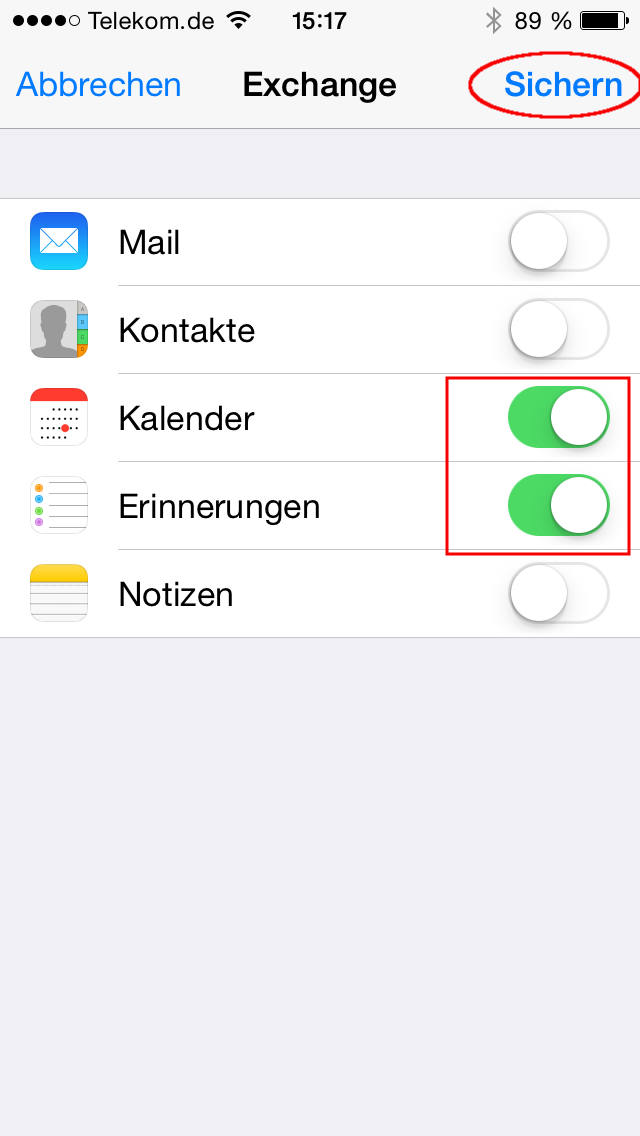
Choose to synchronize Calendars and Reminders and then save. |
 |
 |
| Copy the CalDAV Account URL in the Subscription tab. | Create an account in your iCal preferences using CalDAV, your username and password and the copied address. It may be necessary to restart the calendar in order to be able to see all subscribed calendars. |
Now you are ready to synchronize all of your calendars and tasklists. Unfortunately it is not possible to synchronize PHYSnet Webmail notes with OS X Notes. You may use imap synchronization instead.
If you prefer to use Thunderbird as a local email client you can still have your PHYSnet Webmail Calendar synchronized by using CalDAV within the Lightning Add-On.
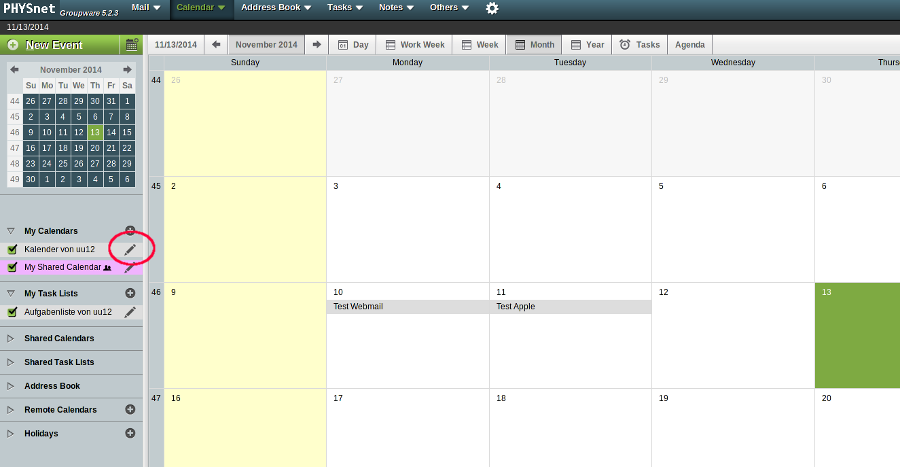 |
Choose the calendar you want to synchronize in the "My Calendars" menu and enter the menu for editing the calendar. |
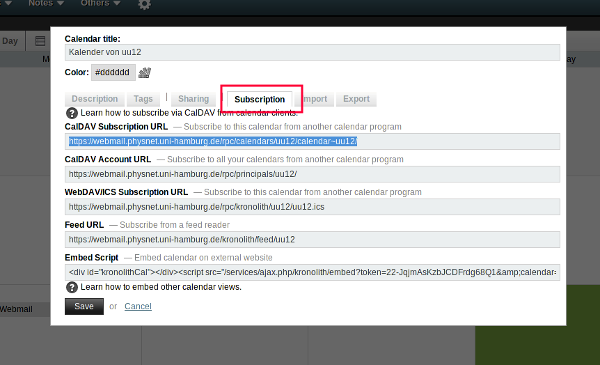 |
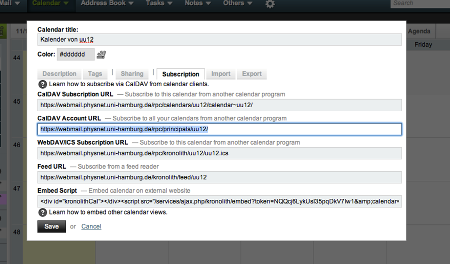
Copy the CalDAV Account URL in the Subscription tab. |
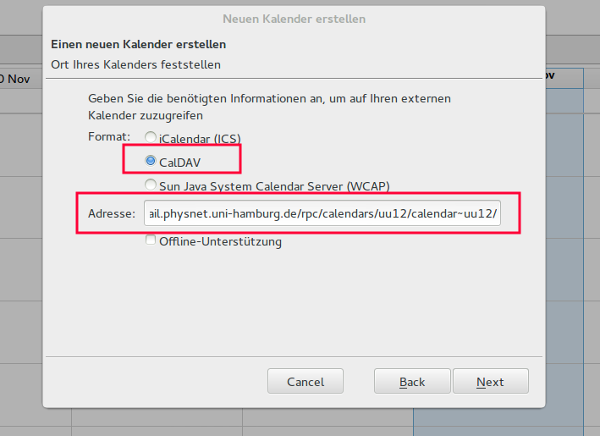 |
Create an new calendar on the network in your Lightning using CalDAV and the copied address. In the next section you can choose any calendar name, calendar color and email address. After finishing the installation you may be requested to enter your PHYSnet Webmail username and password. |
Please make sure that the time zone settings in PHYSnet Webmail correspond to the time zone settings in Lightning. You can turn off missed reminders which keep popping up in the Lightning settings.
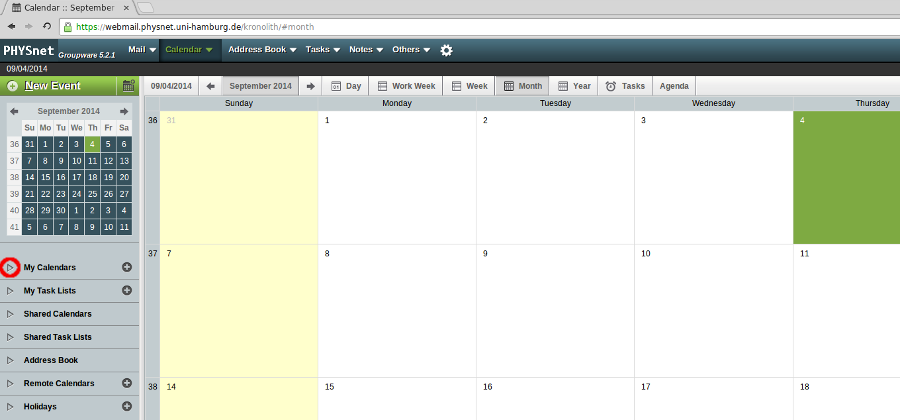 |
The menu "My Calendars" shows all your calendars. |
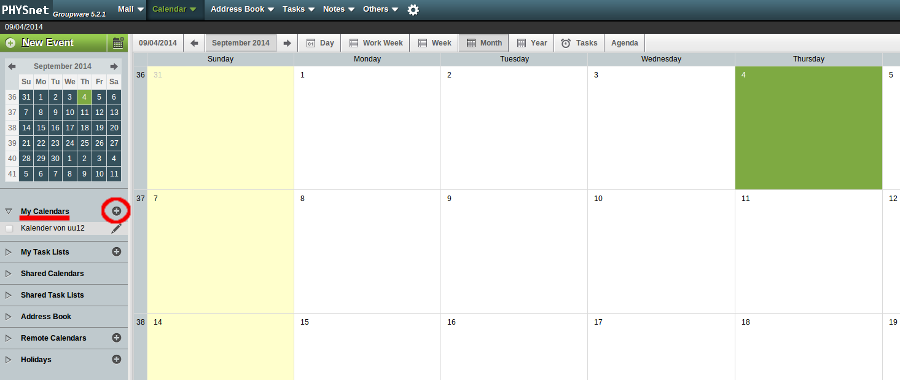 |
This adds a new calendar owned by you. |
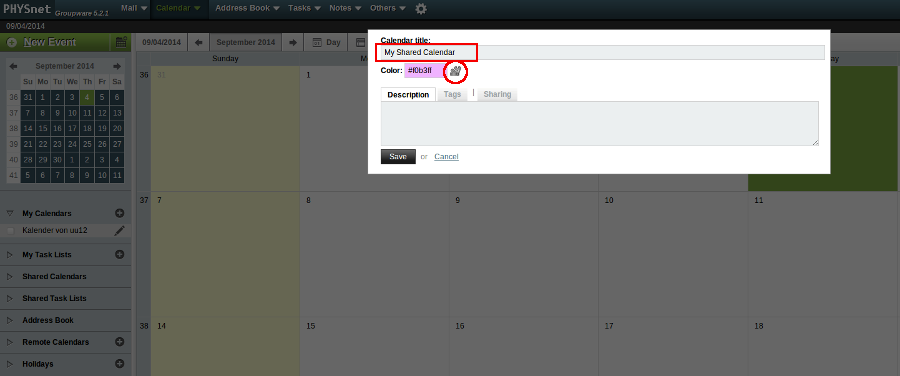 |
Choose a title and voluntarily a description. If you like you can customize the color by clicking on the emphasized button. |
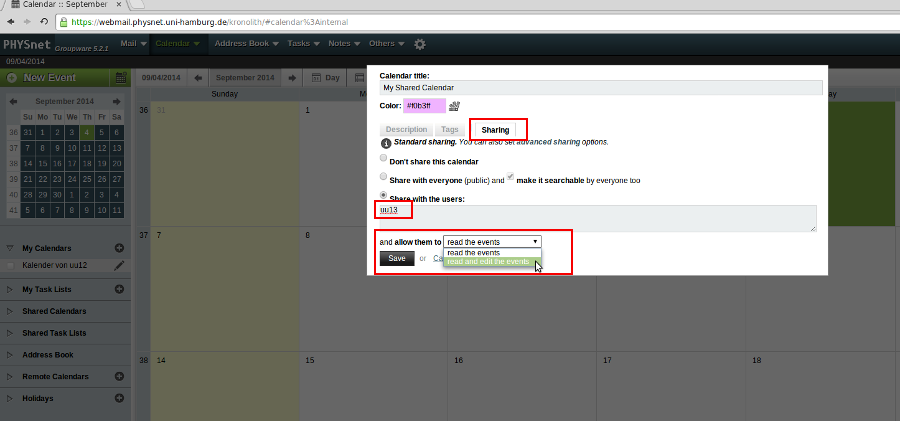 |
The sharing options are set in the tab "Sharing". |
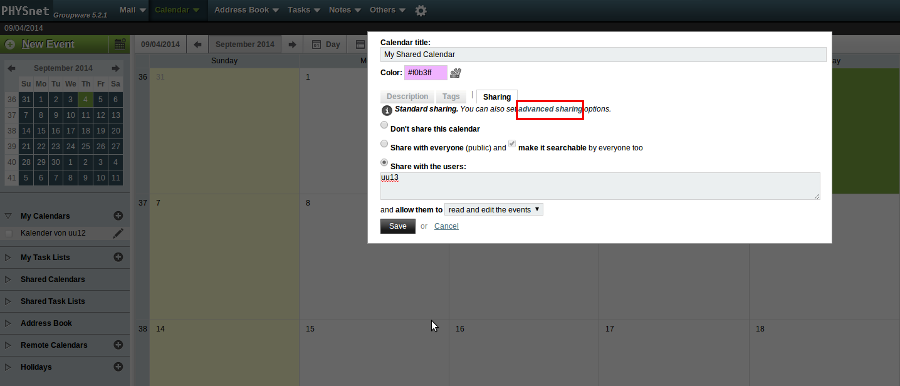 |
You can allow a user to delete events in the "advanced sharing options". |
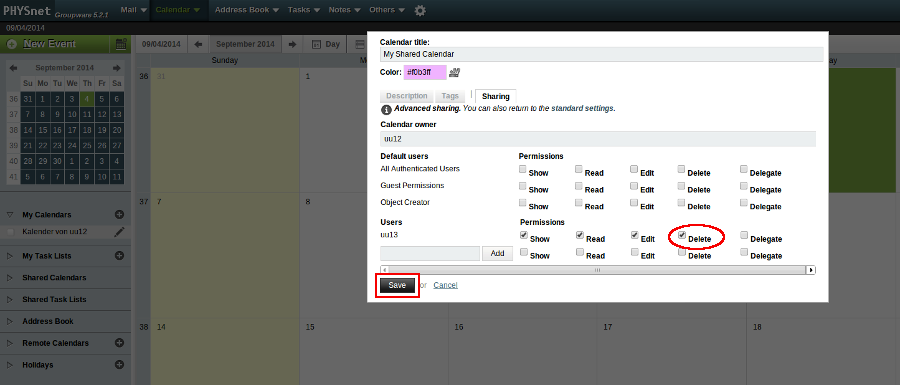 |
Last but not least save your settings. |
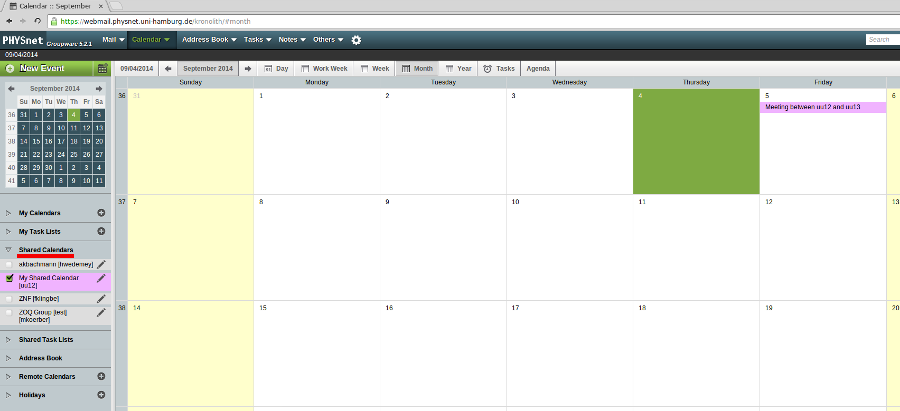 |
The shared calendar is presented to the authorized user in the "Shared Calendars" section. Events of this calendar are displayed in the color chosen by you. |
If you prefer to use Thunderbird as a local email client you can still have your PHYSnet Webmail Address book synchronized by using CardDAV within the Lightning and SOGo Connector Add-On.
 |
 |
|
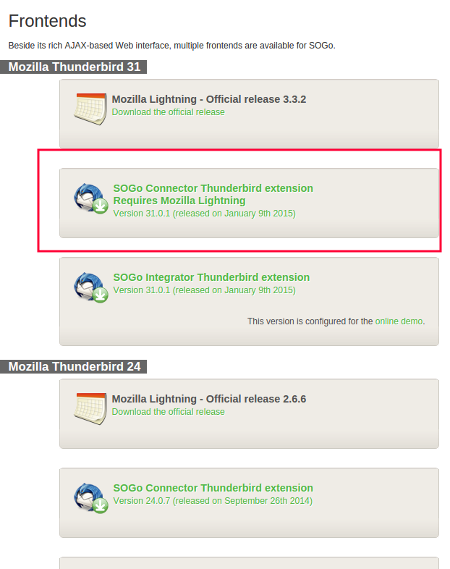
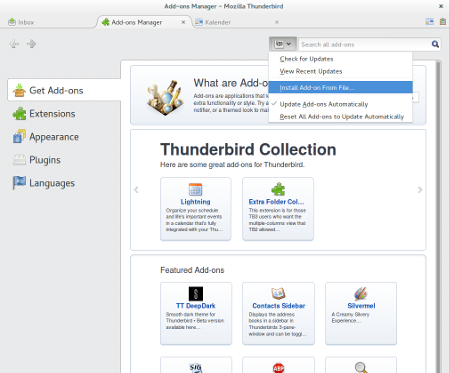
| Download the "SOGo Connector Thunderbird extension" for your Thunderbird version from http://www.sogo.nu/downloads/frontends.html. Please make sure to have installed the Lightning AddOn. | Install the "SOGo Connector Thunderbird extension" from file. | |
 |
The menu "My Calendars" shows all your calendars. |
 |
||
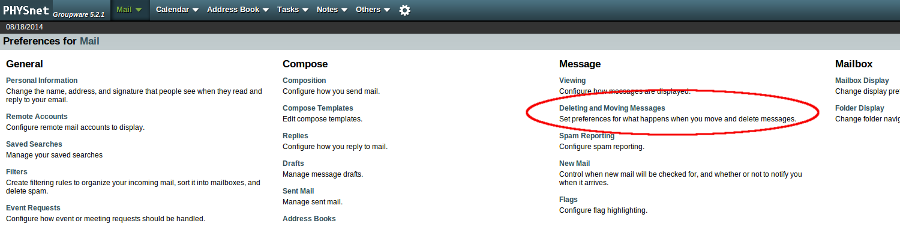 |
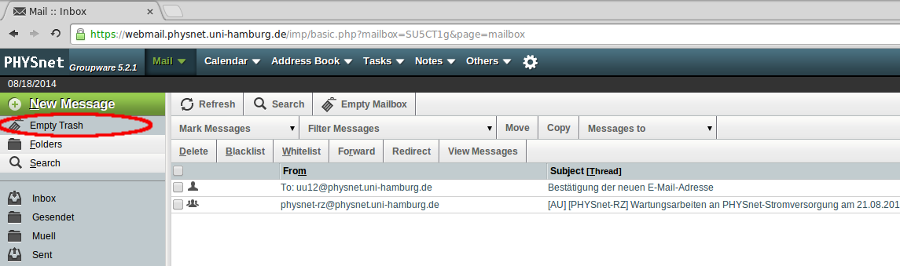
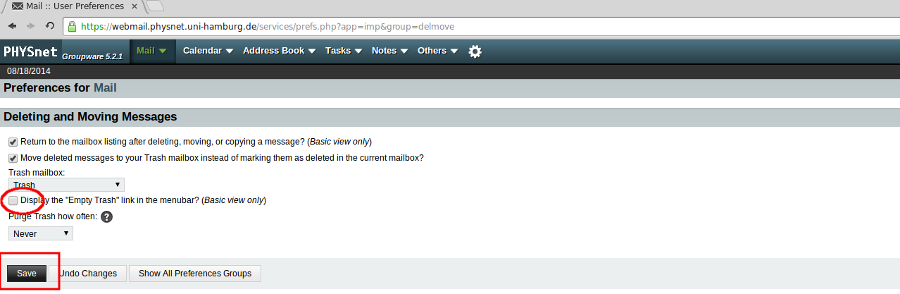
You can remove the button at Preferences > Mail > Deleting and Moving Messages by disabling the checkbox. Don't forget to save your settings :) | |
 |
 |